Yeast cheese cake with kefir in the oven
0
1754
Kitchen
World
Calorie content
192.3 kcal
Portions
4 port.
Cooking time
30 minutes.
Proteins *
11.1 gr.
Fats *
11.8 g
Carbohydrates*
26.6 gr.

Yeast cakes with cheese are perfect as an independent baking for tea or coffee, and as an addition to various main courses. Such a tortilla will make any soup or, for example, a vegetable stew even tastier and more satisfying. Also, these products can be used as a base for delicious sandwiches. Extremely versatile! To prepare these pastries, we recommend taking cheese with a high percentage of fat - it is softer and melts well, and the cakes with it are juicier.
Ingredients
Cooking process
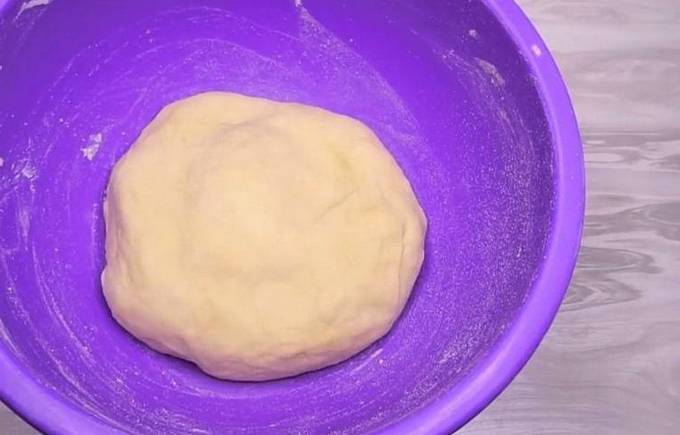
Knead the dough. To do this, measure out kefir in the specified amount and heat it to a hot state. We put a piece of butter in it. Stir until the butter is completely melted. We leave the kefir-oil mixture to cool to a warm state. Sift half of the flour into another bowl. Pour salt, granulated sugar and dry yeast into it, mix the dry ingredients thoroughly with each other. Pour the warm kefir-oil mixture in a thin stream into the dry mixture, while kneading the dough with a spoon. Pour in vegetable oil, mix. Then add the remaining flour in portions and gradually knead the soft, but well-shaped dough. It should not stick to your hands after kneading. We roll the mass into a smooth ball, put it in a bowl and tighten it with cling film. We put the dough in a warm place for one to one and a half hours for proofing. During the specified time, the mass should noticeably increase in volume.

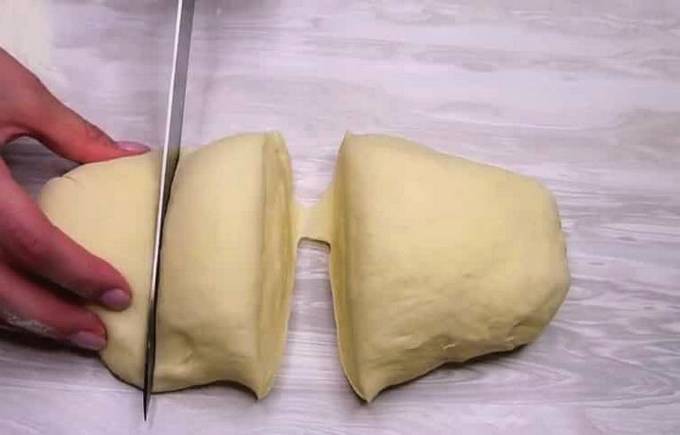
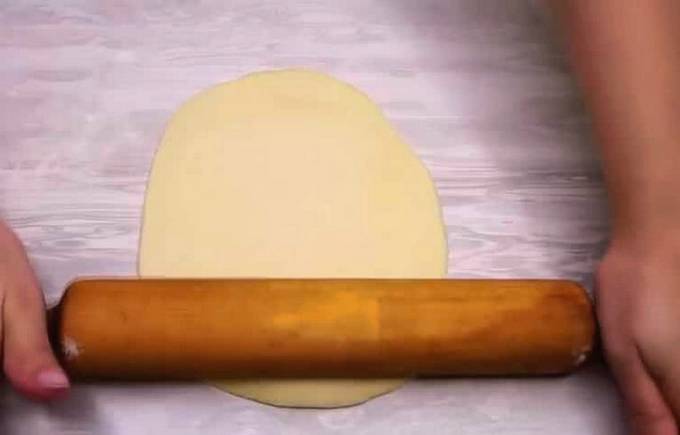
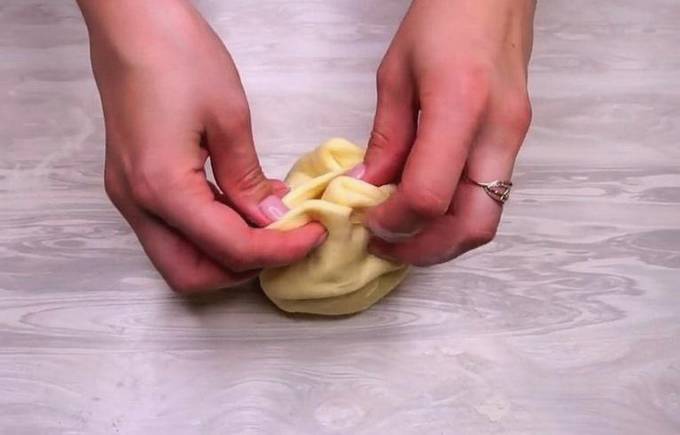
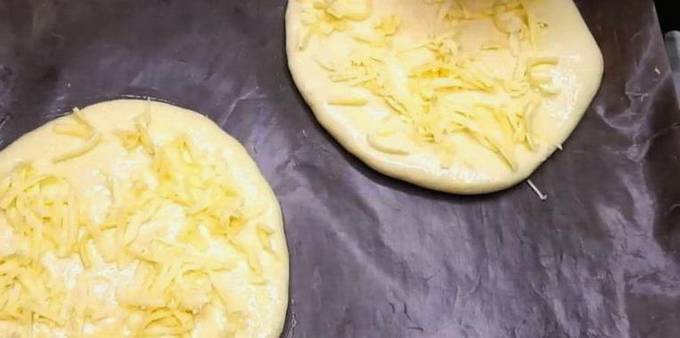
Divide the prepared cheese filling according to the number of dough parts, plus one more part for sprinkling the surface. Place the cheese mass in the center of each rolled flat cake. Raise the free edges over the filling and squeeze them together. We pinch it well with our fingers - it looks like a bag. Turn the workpiece over with a pinch down, press it with the palm of your hand and gently roll it into cakes with a rolling pin. The approximate thickness of the stuffed cakes is one centimeter.
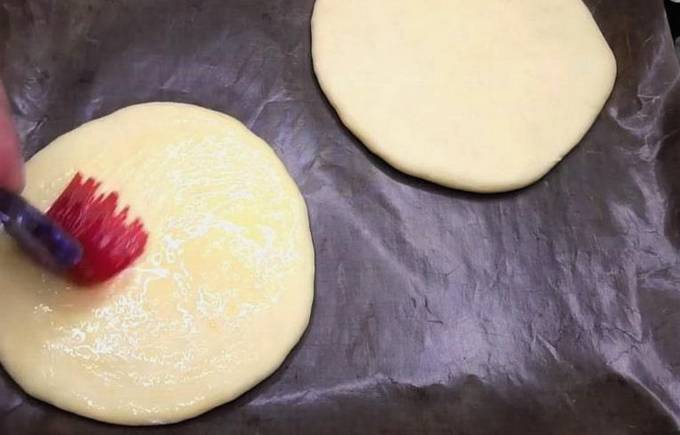
Grease the baking sheet with vegetable oil or cover with oiled parchment. We spread the prepared cakes on it at a distance from each other, since the dough increases during baking.Shake the egg well in a separate bowl and grease the surface of the cakes with the resulting mixture using a silicone brush.

Preheat the oven to a temperature of 220 degrees. Set the baking sheet with tortillas to the middle level and bake for fifteen to twenty minutes. Finished cakes noticeably increase in volume and are covered with a golden crust. We take them out of the oven, transfer them to a serving plate and immediately serve them to the table. Store the cooled cakes in a sealed container or in a bag and heat them in the microwave if necessary.
Bon Appetit!