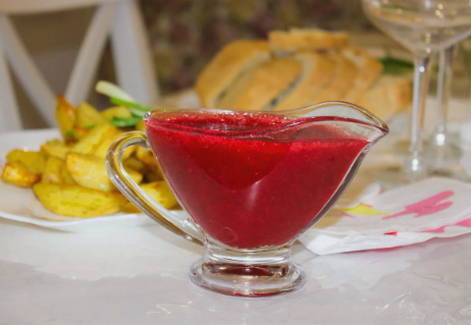
Red currant sauce for meat without vinegar for the winter
1
1792
Kitchen
World
Calorie content
152.3 kcal
Portions
0.4 l.
Cooking time
80 minutes
Proteins *
0.7 g
Fats *
0.2 g
Carbohydrates*
36.9 gr.

If you want to diversify your usual dishes and give them an unusual taste, you should read this recipe to the end. This sauce is distinguished not only by its pleasant taste, but also by the beneficial substances contained in the natural products that you use.
Ingredients
Cooking process
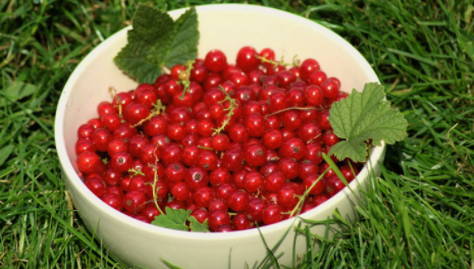
To begin with, we process red currants. Sort the berries, removing any spoiled fruit. To save your time and remove all the garbage from the berries, pour the currants into a container and fill it with water. Various leaves and pieces of twigs will immediately float to the surface. You can remove them with a piece of clean cloth. After that, change the water and leave the berries in it for 30 minutes. When the time is up, rinse the berries several times. Pour them into a colander. Leave the berries in it. So the main part of the liquid will drain from the currants. Spread a towel on the table. Place the berries on it.
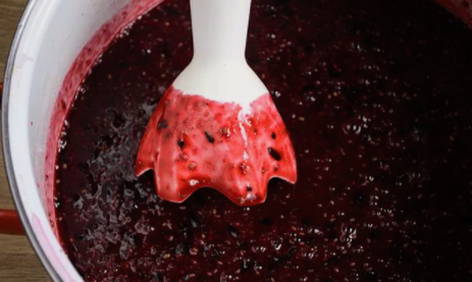
When the berries are dry, grind the currants. This can be done manually with a pusher. You can also use a blender or meat grinder to save your time. Transfer the resulting berry puree to a saucepan and put on fire. Wait for the mass to gurgle a little. Add the first portion of sugar to it and stir well. Make sure that the berry mass does not start to boil. If this happens, you will have to discard the food and start over. When all the sugar is added, pour the spices into the pan: a little salt, chopped ginger, black pepper, chili and cinnamon. Stir the sauce thoroughly.
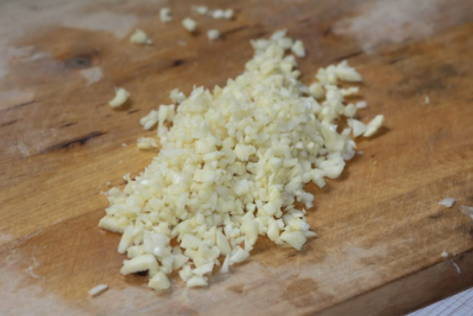
Peel the garlic. For the sauce, we only need 3 cloves. Chop it finely with a knife. You can also press the garlic through a press. Add it to the sauce. Stir the berries and continue to cook them over low heat for 10-15 minutes. As a result, the sauce should thicken slightly. When the time is up, remove the pan from the heat. You do not need to cook the sauce anymore, as this may cause loss of its beneficial properties.
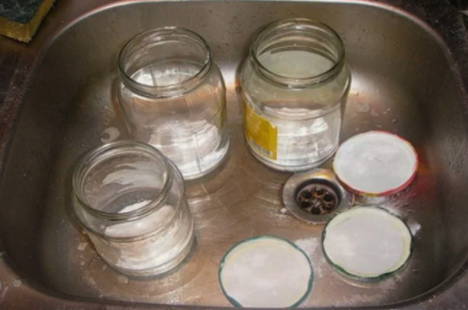
Let's start sterilizing the cans. First, rinse them in warm water. To do this, use baking soda or regular detergent. Pour cold water into a small saucepan. Place it on the stove. When the water boils, scald the jars and lids with boiling water. Further sterilization will be carried out using steam. You can use a kettle or pot for this. You need to position the jar so that it fills with steam. Leave it in this position for about 2-3 minutes. After that, put the jar on a towel, which you need to spread out on the table in advance.

Strain the sauce before filling the jars. This will make it more uniform and less dense. Spread the sauce over the jars. Screw on the caps. Turn the jars over and place them on a towel.In this position, the lid will undergo additional heat treatment. When the jars are completely cool, transfer them to a cool place. For example, in the refrigerator. You need to store the sauce in the same place.
Similar recipes
Comments (1) 1
Tatiana
01-08-2021 13:34
Not clear what it means to strain? Those. will the pitted pulp remain in the gauze? Or is the sauce supposed to be pitted?
0
to answer
Site administration
Yes, the bones in the sauce will make it worse.